What is XPS tile Backer Board ?
In the dynamic world of construction and renovation, the right materials can make all the difference. Here we introduce our high – quality XPS Tile Backer Board, a revolutionary product that combines functionality, durability, and ease of installation.
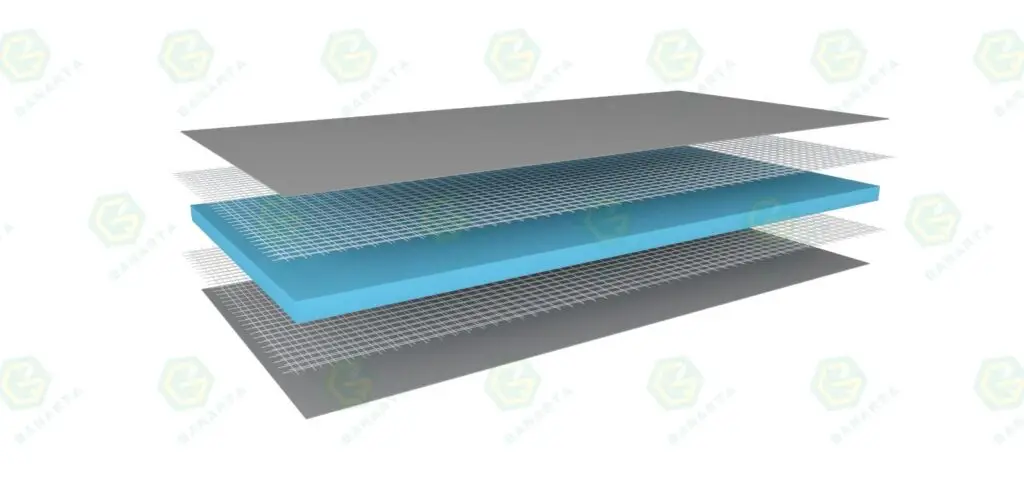
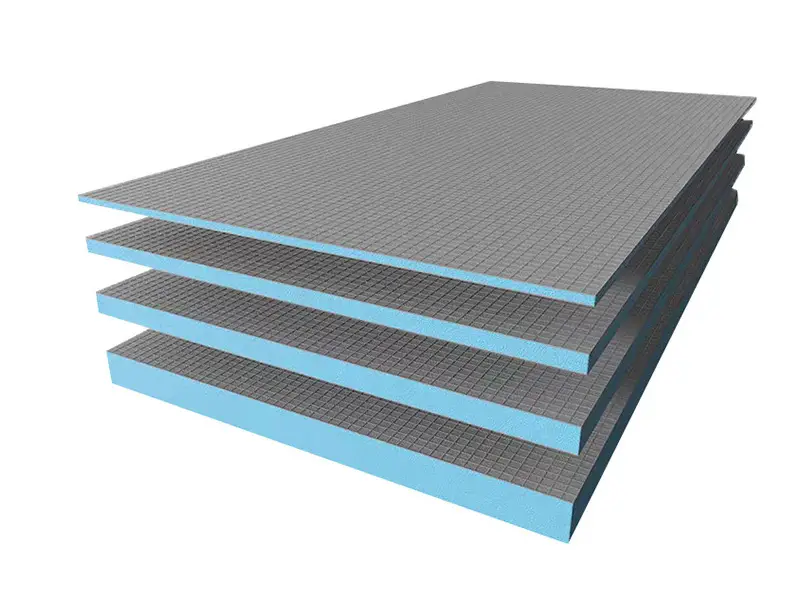
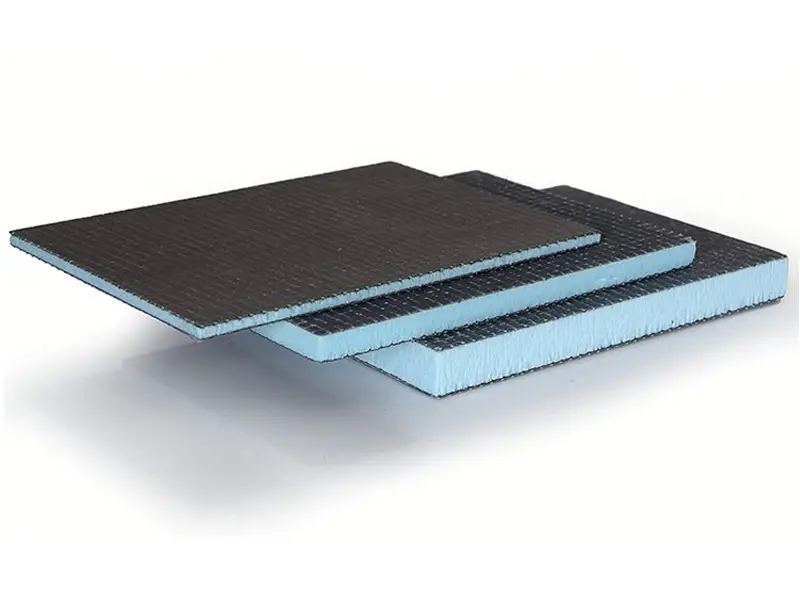
XPS Tile Backer Board is composed of extruded polystyrene (XPS) foam, a rigid thermoplastic material with high compressive strength. Its closed-cell structure provides water resistance, thermal insulation, and dimensional stability. Its both surface is reinforced with fiberglass mesh and cementitious coatings. It has enhance d the durability and adhesion for tile installations. This lightweight, moisture-proof material suits wet areas like showers ,etc…
XPS Tile Backer Board is primarily used as a waterproof substrate for tile installations in moisture-prone areas such as showers, bathroom walls, and kitchen countertops.
Its lightweight, mold-resistant properties make it ideal for wet environments, preventing structural damage from water penetration.
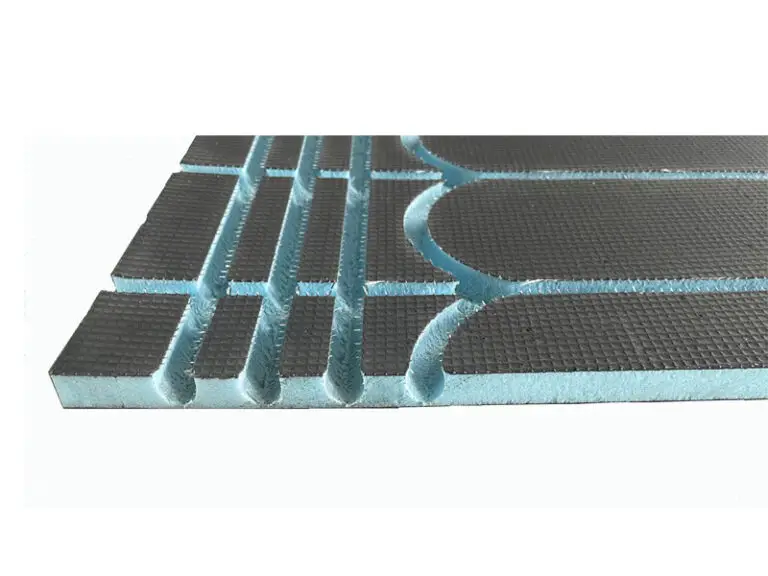
It also serves as an underlayment for radiant floor heating systems and provides thermal insulation for walls or floors. Compared to traditional cement boards, it reduces structural load, simplifies installation, and ensures dimensional stability in humid conditions.
How to install XPS Tile Backer Board?
Here’s a step-by-step guide to installing XPS Tile Backer Board:
Tools & Materials Needed
- XPS Tile Backer Boards
- Utility knife or fine-tooth saw
- Corrosion-resistant screws (stainless steel or coated)
- Waterproof sealant or fiberglass mesh tape
- Thin-set mortar (polymer-modified)
- Notched trowel
- Drill/driver
- Measuring tape, straightedge, pencil
- Safety gear (gloves, goggles, mask)
Installation Steps
- Prepare the Substrate
- Ensure the wall/floor is clean, dry, and structurally sound. Remove debris or protrusions.
- For walls: Check stud spacing (16″ or 24″ on center) and add blocking if needed for edge support.
- Measure & Cut the Boards
- Mark measurements on the board using a straightedge.
- Score the board with a utility knife and snap it, or use a saw for precise cuts.
- Dry-Fit the Boards
- Place boards against the substrate without adhesive/screws to verify fit. Leave a 1/8″ gap between boards for expansion.
- Secure the Boards
- For walls: Attach boards to studs using screws every 6-8 inches along edges and 12 inches in the field.
- For floors: Apply a layer of thin-set mortar to the substrate, then press the board into place. Secure with screws if required.
- Ensure screws are flush with the board surface (avoid over-tightening).
- Seal Joints & Edges
- Apply waterproof sealant or fiberglass mesh tape over all seams, corners, and screw heads.
- Embed the tape into a layer of thin-set mortar for a seamless, waterproof barrier.
- Cure and Inspect
- Allow sealant/mortar to cure fully (check product instructions for timing).
- Verify the surface is flat, rigid, and free of gaps.
- Install Tiles
- Use flexible thin-set mortar to adhere tiles directly to the XPS board.
- Follow standard tiling practices (e.g., maintaining even spacing, cleaning excess mortar).
Key Tips
- Moisture Protection: Seal all penetrations (e.g., plumbing) with silicone or sealant.
- Temperature: Install in conditions above 50°F (10°C) for proper adhesion.
- Code Compliance: Check local building codes for fire ratings and substrate requirements.
Related XPS Tile Backer Board Products
For procurement and project comparison, review the matching Banarta product pages: XPS Tile Backer Board, Foam Backer Board for Wet Rooms, and Bathroom XPS Tile Backer Board.
XPS Tile Backer Board Buyer Routing
If you searched for xps tile backer board installation, waterproof board for shower, floor insulation boards, or tile backer board market, use this guide for background and then compare the commercial product pages: XPS Tile Backer Board, Foam Backer Board for Wet Rooms, and Bathroom XPS Tile Backer Board.
For buyers comparing alternatives such as DensShield tile backer, Banarta's XPS board pages should be reviewed as XPS foam-based backer board options, not as a brand-equivalent specification claim.
XPS Tile Backer Board Product Routing
This guide supports buyers comparing XPS tile backer board, waterproof backer board and foam backer board options. For commercial selection, use the product links below instead of treating this guide as the final product page.
XPS Tile Backer Board Selection for B2B Projects
Banarta supplies XPS tile backer board options for distributors, contractors and project buyers who need lightweight, waterproof and insulation-supported boards for shower walls, wet rooms, bathrooms and underfloor heating systems. This page is a selection hub: compare the main Banarta backer board options, then open the matching product page for project sourcing.
How to choose the right backer board
- Shower and wet-room walls: choose waterproof XPS foam tile backer boards with cement-coated or mesh-reinforced surfaces for tile bonding.
- Underfloor heating support: choose insulated XPS boards that reduce heat loss and provide a stable tile substrate.
- Distributor or project supply: confirm thickness, surface coating, board size, packing method and project quantity before placing an inquiry.
Foam board vs cement board intent
General searches such as “foam backer board” often include retail or DIY users looking for single boards. Banarta focuses on B2B XPS tile backer board supply, project quantities and product selection for importers, distributors and construction-material buyers.